


Installation Guide
Revolutionary composite laminate floors, researched and developed with German expertise and advanced technology.
Before you start
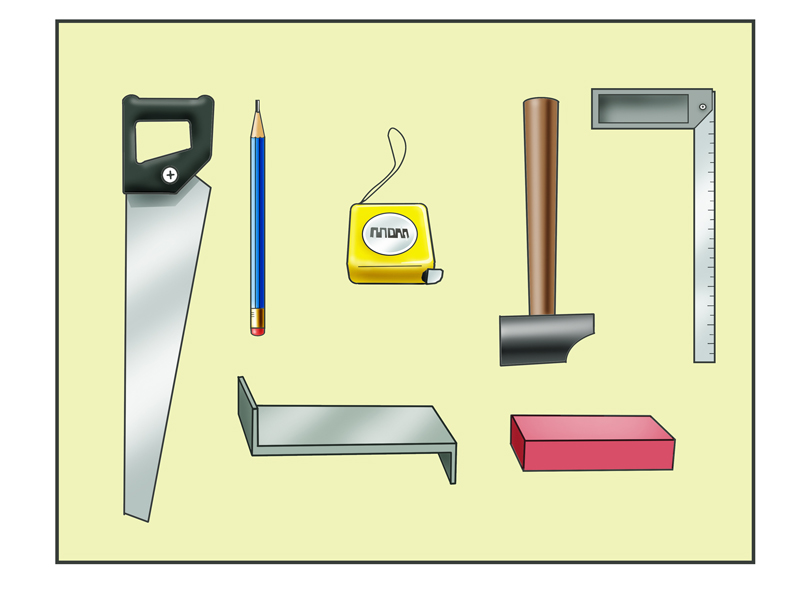
Tools required
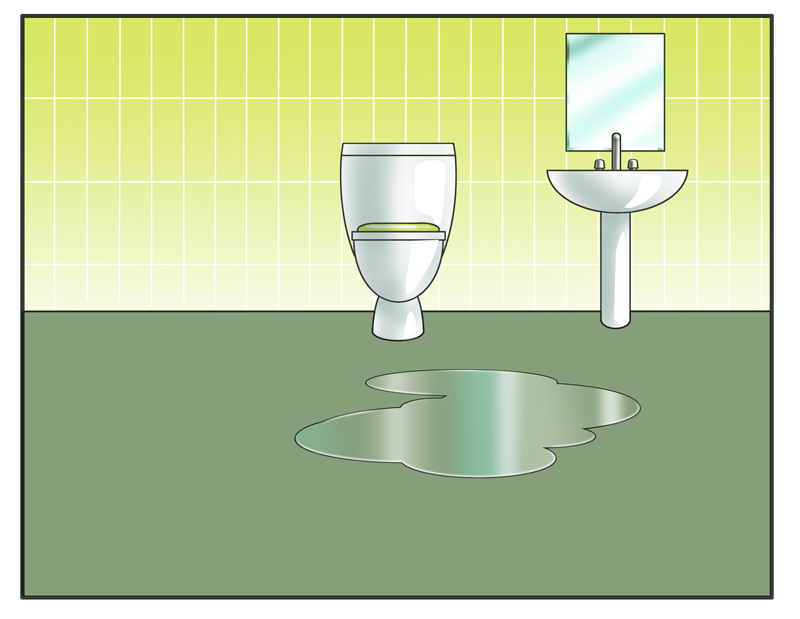
Suited to moisture prone areas
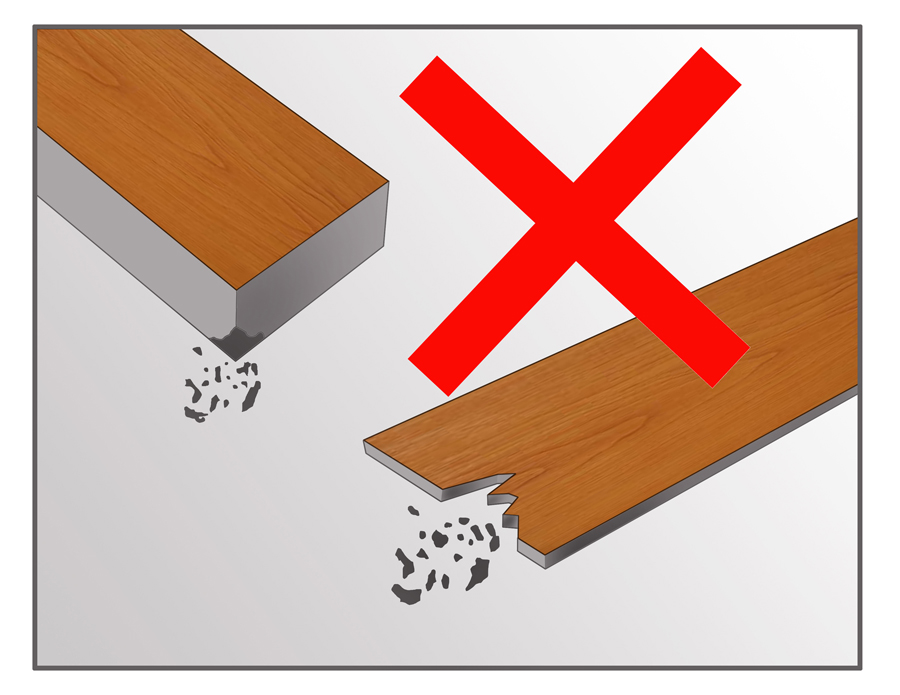
Discard damaged panels
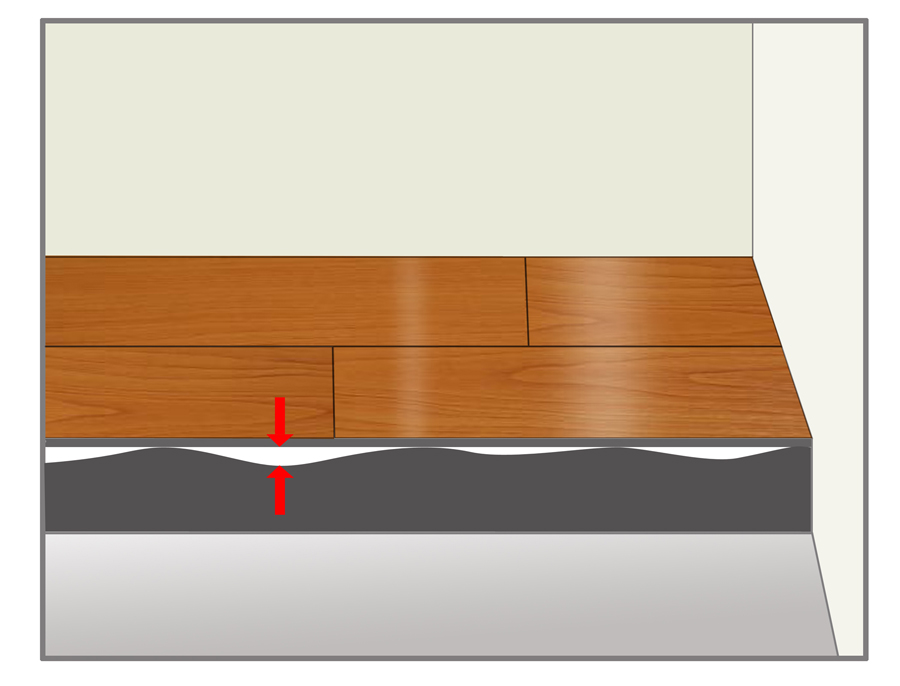
Level of unevenness not to exceed 3mm/1m
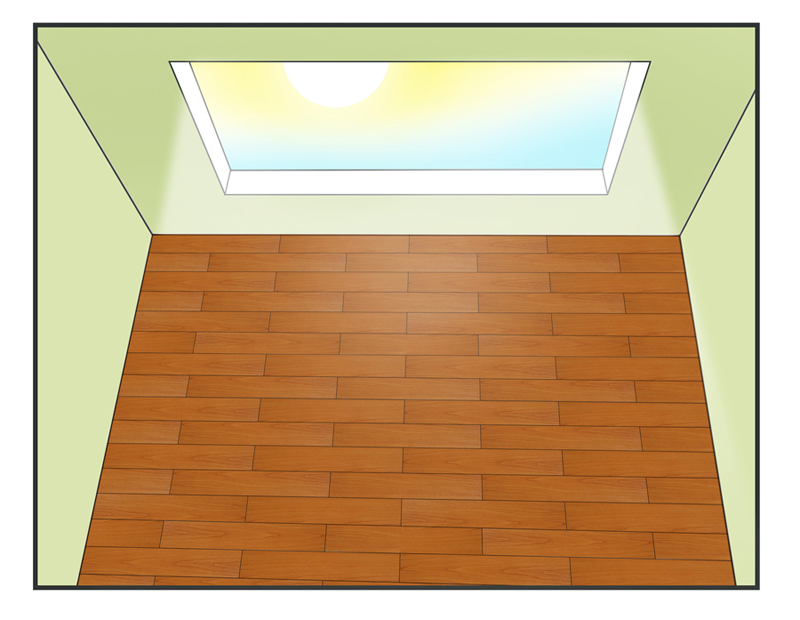
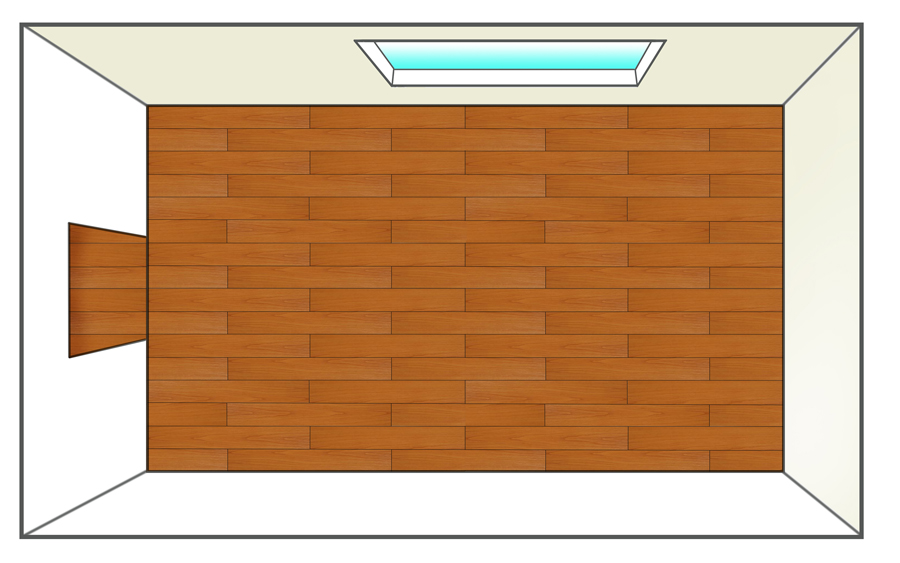
Install panels parallel to main direction of light
Installation
Lay panels close together on floor
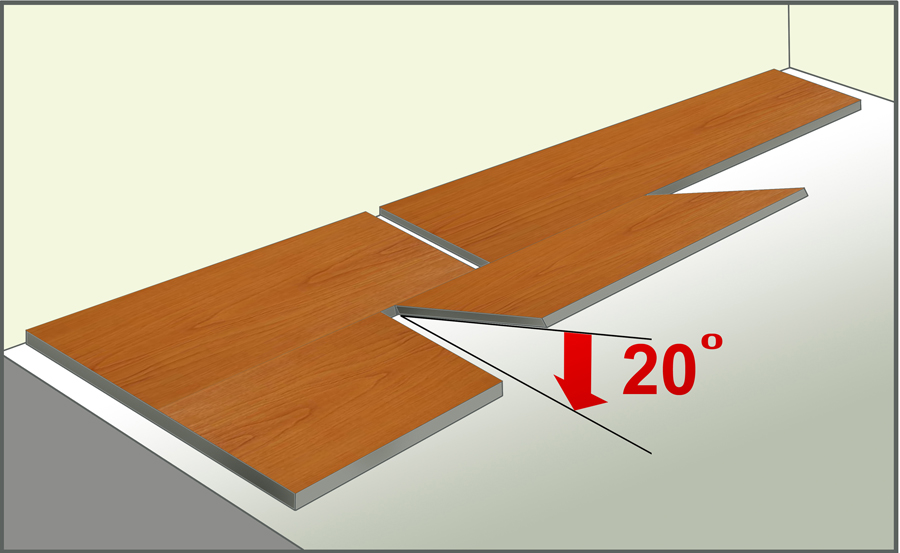
Lock in half length panel with tilt motion
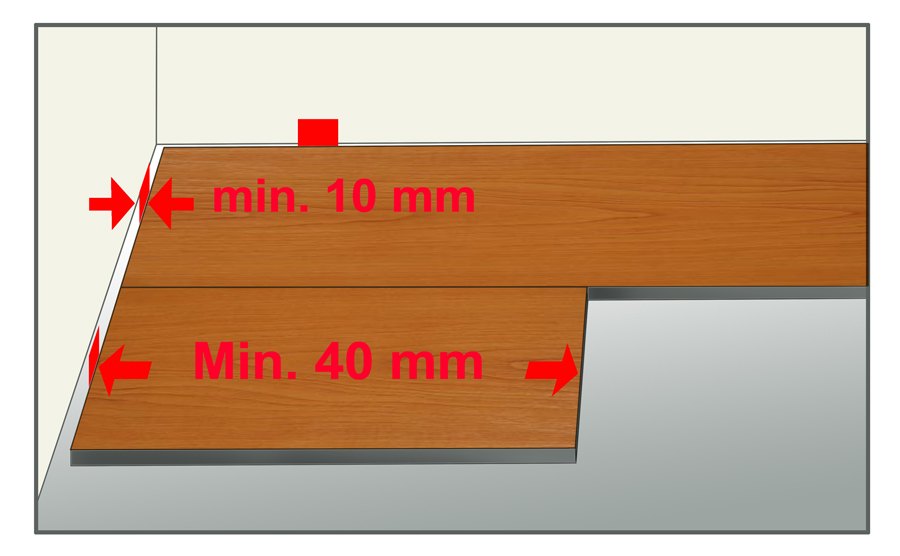
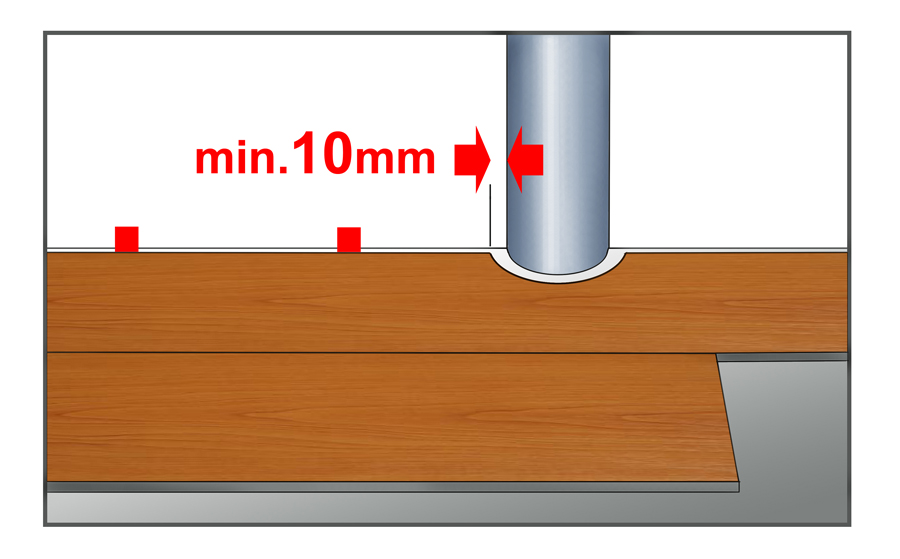
Observe clearance
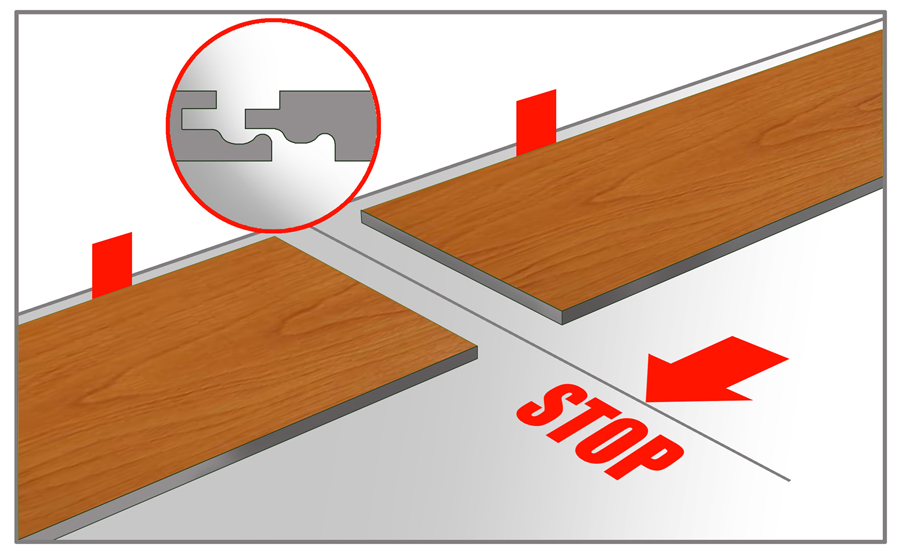
Link panels in lengthways
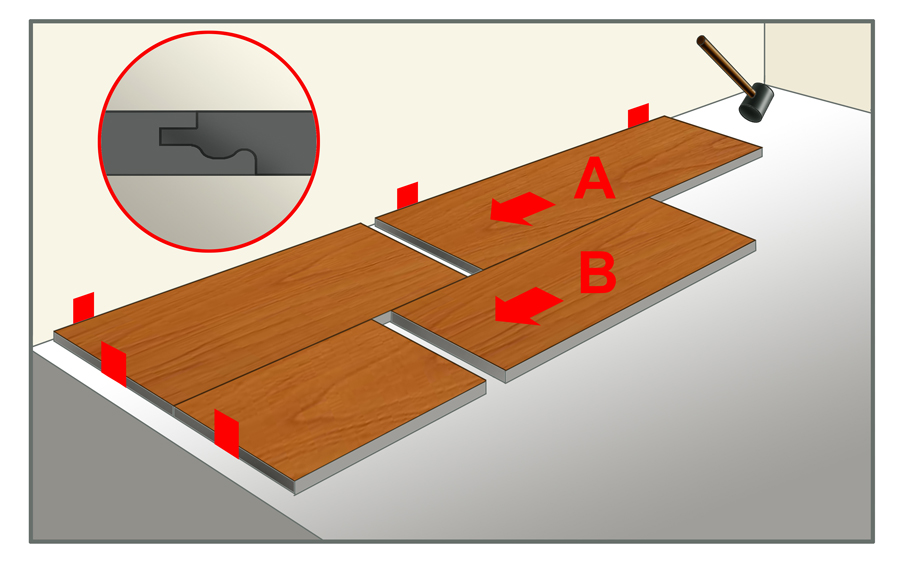
Link panels transversely
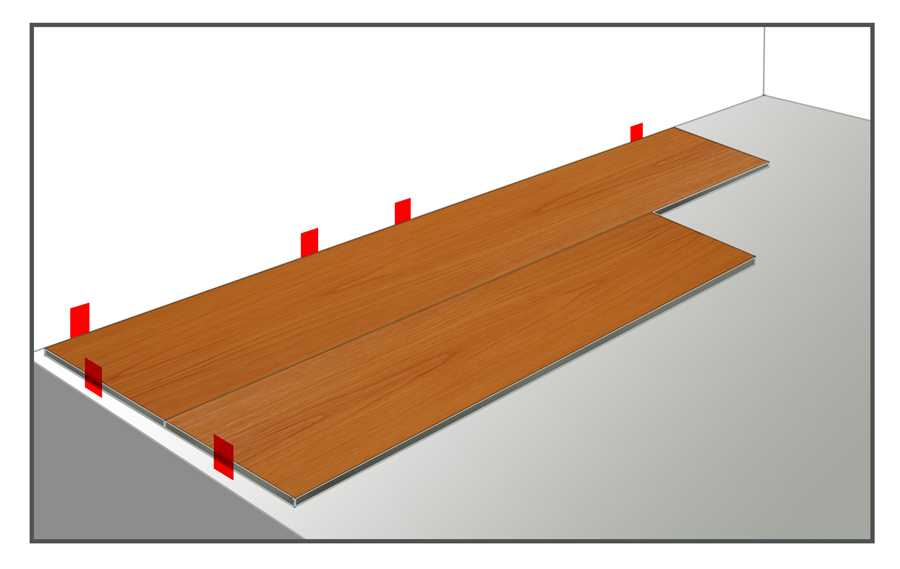
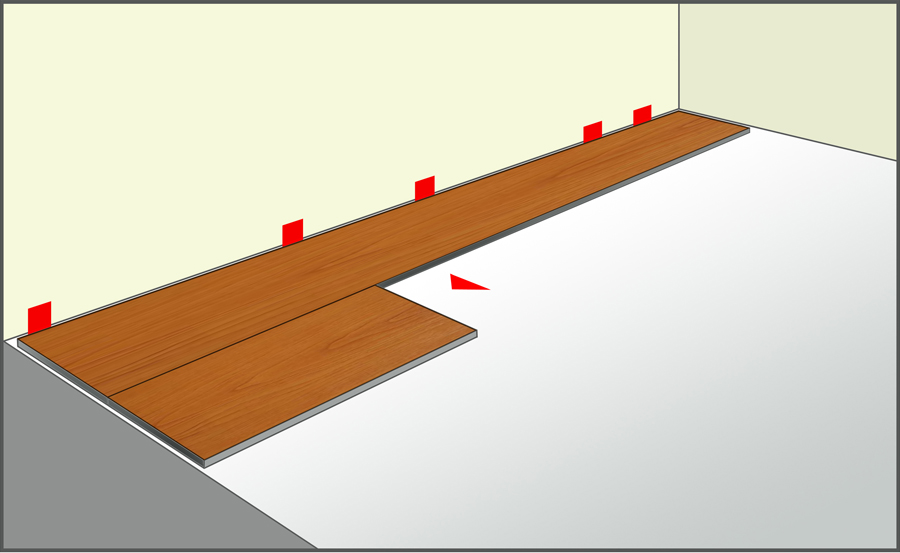
Continue in stepped fashion
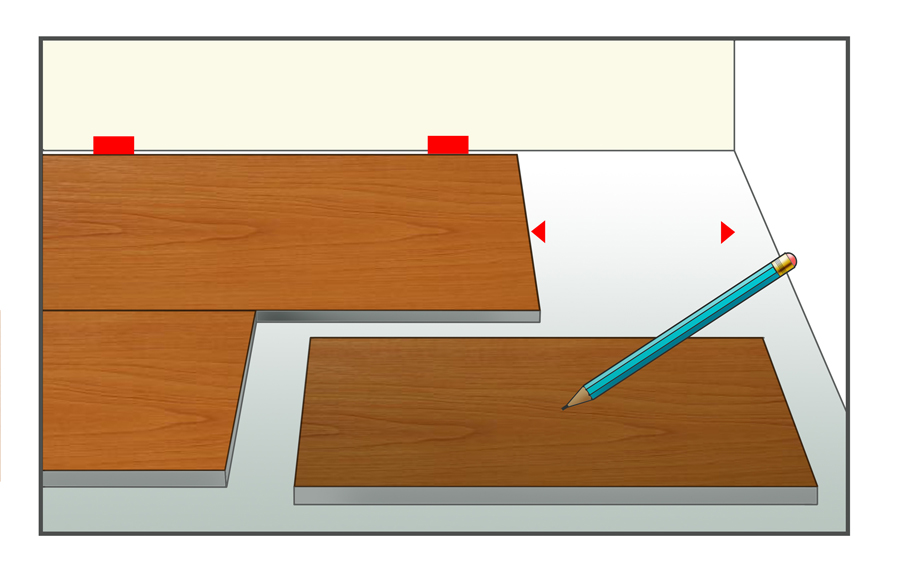
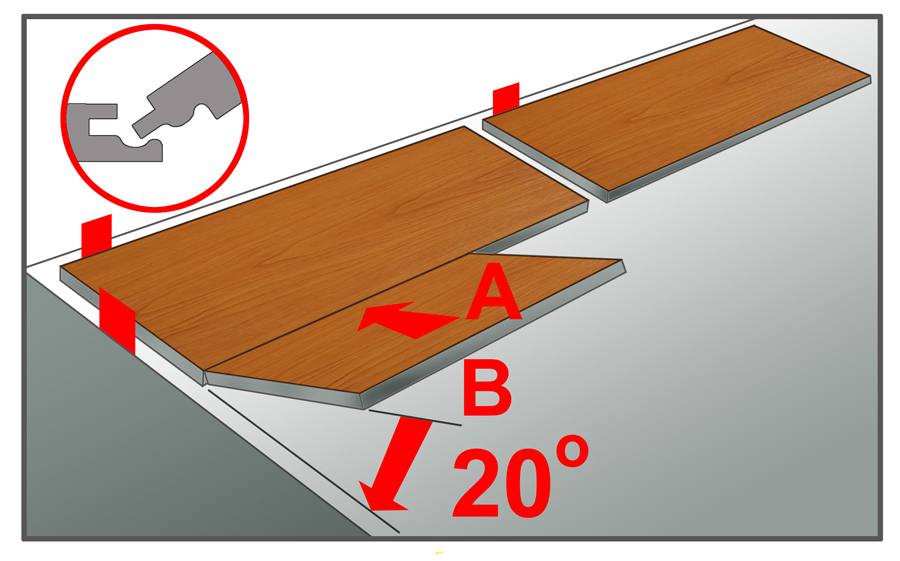
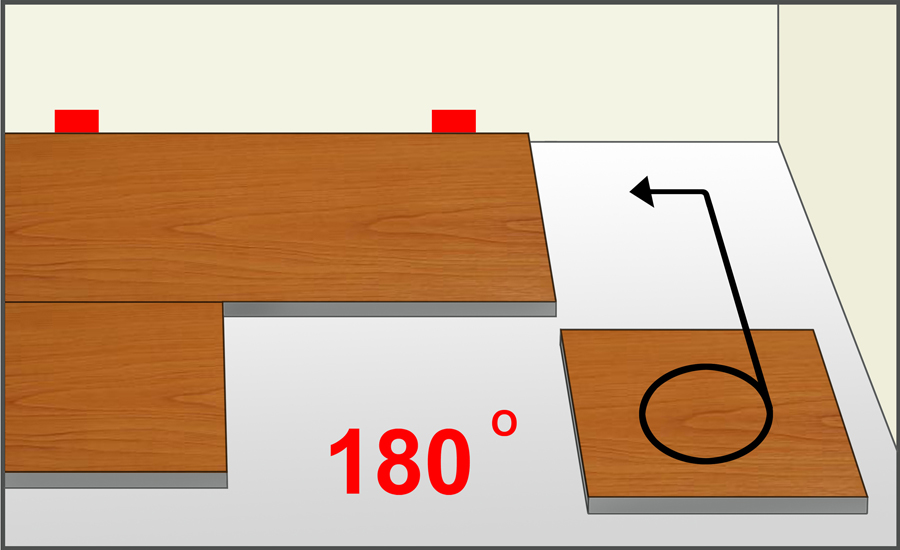
Rotate off-cut section through 180 and mark accordingly
Shorten last panel, rotate through 180 and slot in
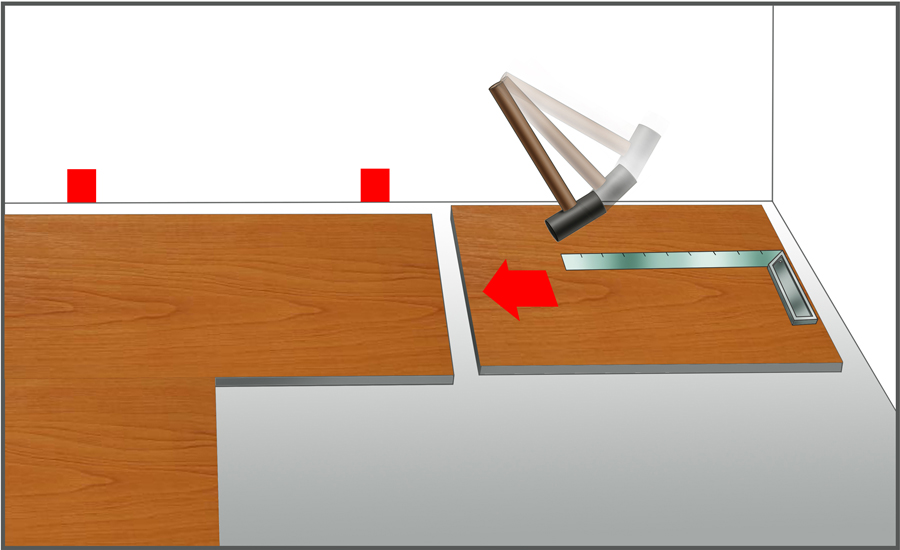
Fit the panels by using drawbar
Start the next row with the leftover section (min. 40cm)
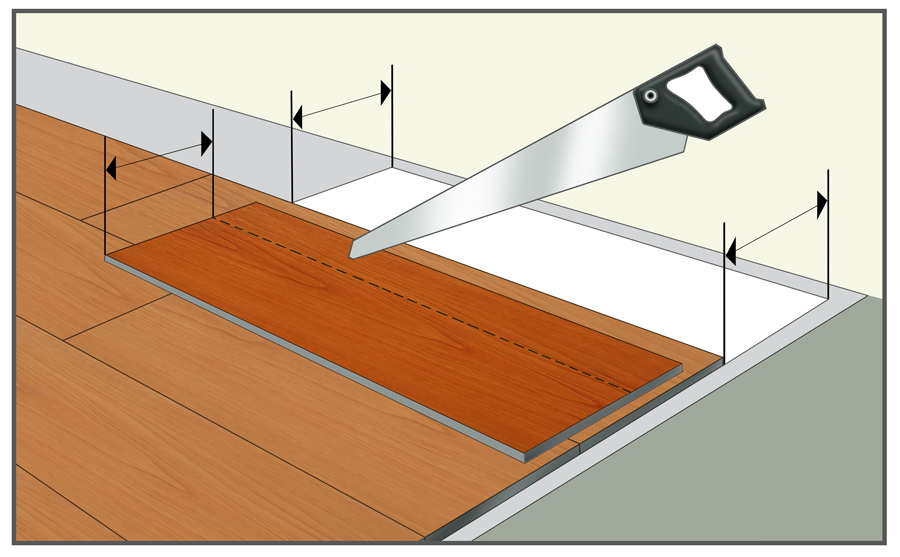
Cut last row to fitting size
Allowing space for expansion
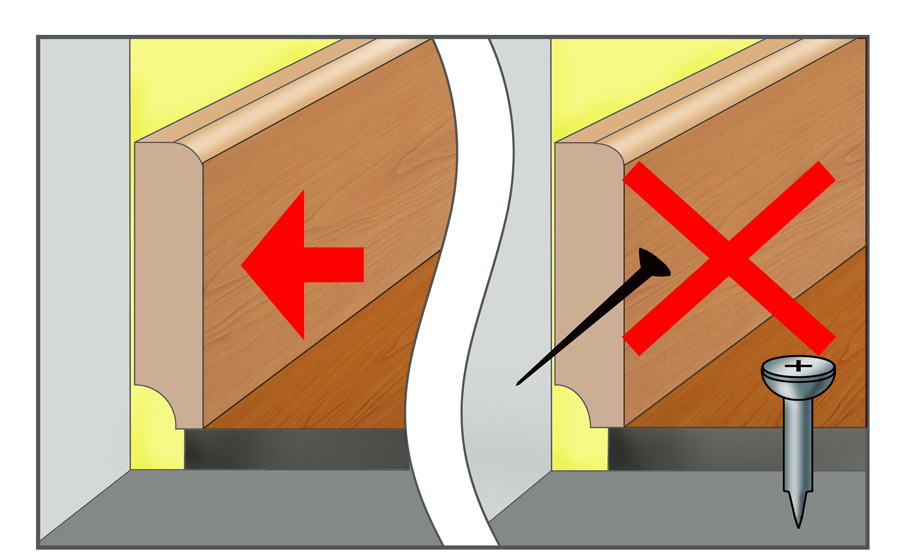
Ensure floor is able to “float”
Done
Troubleshooting
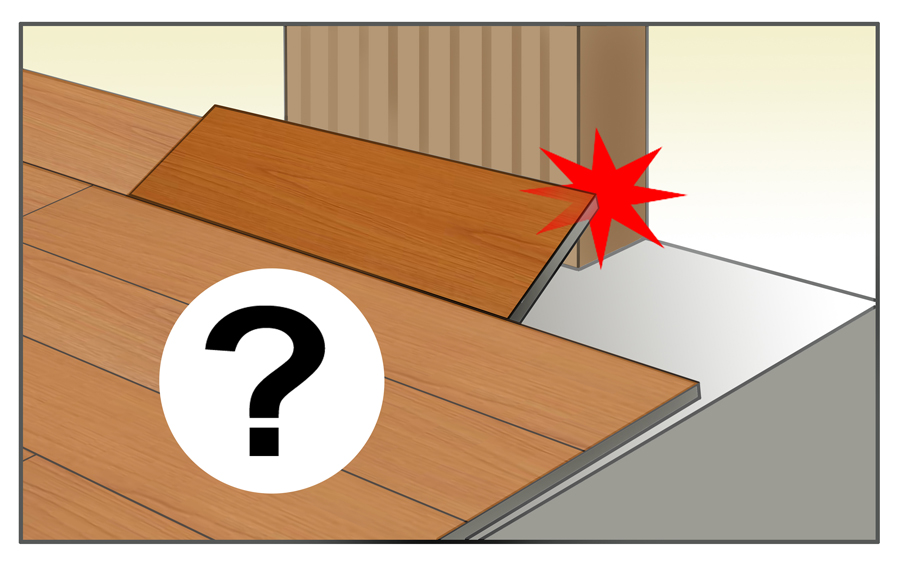
Problem areas: radiators, door frames etc.
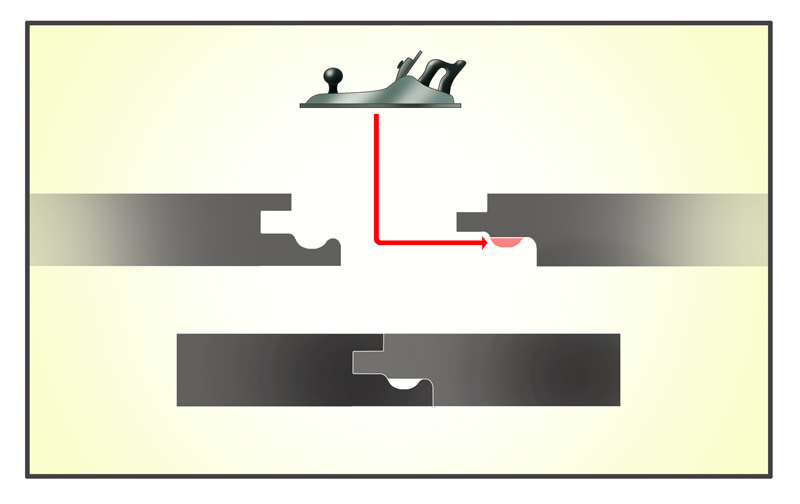
Plane off part of the tongue and groove
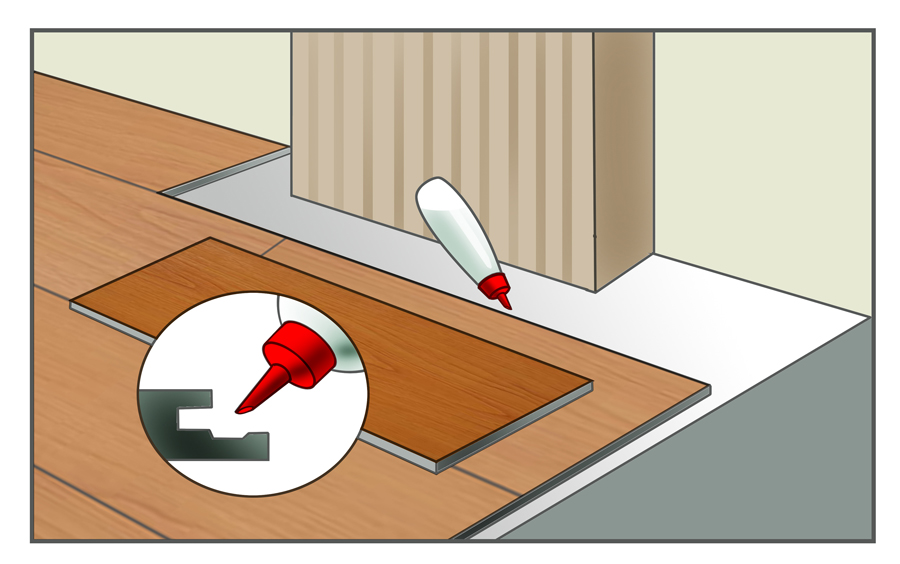
Add glue to joint
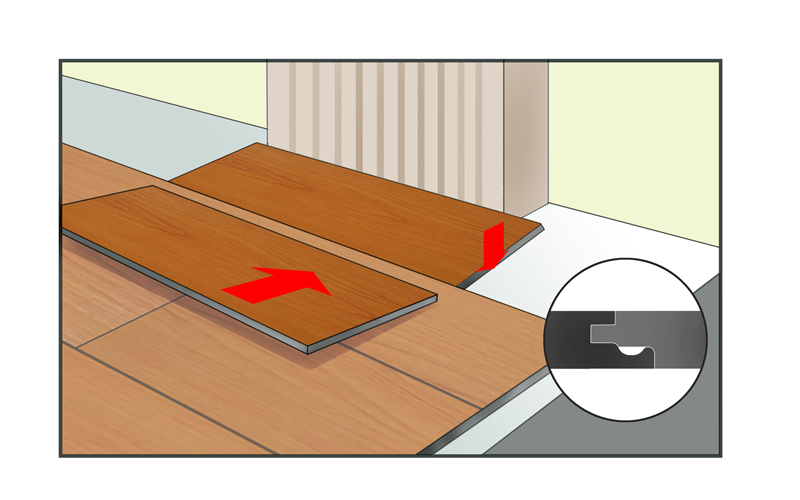
Slide panel in to place horizontally and slot into place
ROOFING
CEILING
PANELING
Delivering Sustainability